Summary: in this tutorial, you’ll learn how to create Django templates, pass data from view functions to templates, and display the data in the templates.
This tutorial begins where creating a Django app left off.
Introduction to the Django templates #
In the previous tutorial, you learned how to return a HttpResponse with a h1 tag from a view. To return a full HTML page, you’ll need to use a template.
Note that it is possible to return a full HTML page by mixing the HTML with Python code. However, it is not practical and doesn’t scale well.
A template is a file that contains the static and dynamic parts of a webpage. To generate the dynamic parts of the webpage, Django uses its specific template language called Django template language or DTL.
The Django template engine renders templates that contain variables, constructs, tags, and filters.
Variables #
A variable is surrounded by {{ and }}. For example:
Hi {{name}}, welcome back!In this template, the name is a variable. If the value of the name variable is John, the Django template engine will render the above template to the following text:
Hi John, welcome back!If a variable is a dictionary, you can access the items of the dictionary using the dot notation (dict_name.key).
Suppose you have a person dictionary with two keys name and email:
person = {'name': 'John', 'email': '[email protected]'}Code language: JavaScript (javascript)… you can access the values of the name and email keys of the person dictionary in the template like this:
{{ person.name }}
{{ person.email }}
Tags #
Tags are responsible for outputting contents, serving a control structure if-else, for-loop, and getting data from a database.
Tags are surrounded by {% and %}. For example:
{% csrf_token %}In this example, the csrf_token tag generates a token for preventing CSRF attacks.
Some tags like if-else and for-loop require beginning and ending tags. For example:
{% if user.is_authenticated %}
Hi {{user.username}}
{% endif %}Code language: PHP (php)
Filters #
Filters transform the contents of variables and tags argument. For example, to capitalize each word of a string, you use the title filter like this:
{{ name | title }}If the value of the name variable is john doe, then the title filter will transform it to the following:
John DoeSome filters accept an argument. For example, to format a date of the joined_date variable in the Y-m-d format, you use the following filter:
{{ joined_date | date: "Y-m-d" }}Code language: JavaScript (javascript)Here are the complete built-in template tags and filters.
Comments #
The comments will look like this:
{# This is a comment in the template #}Code language: PHP (php)The Django template engine will not render text inside the comment blocks.
Django template examples #
First, create a new directory called templates inside the blog directory:
mkdir templatesSecond, create a blog directory inside the templates directory:
cd templates
mkdir blog
Note that the directory inside the templates directory must have the same name as the application name. In this example, the blog directory has the same name as the blog app of the Django project.
Third, inside the templates/blog directory create two template files home.html and about.html with the following contents.
The home.html file:
<!DOCTYPE html>
<html lang="en">
<head>
    <meta charset="UTF-8">
    <meta name="viewport" content="width=device-width, initial-scale=1.0">
    <title>Home</title>
</head>
<body>
    <h1>Home</h1>
</body>
</html>Code language: HTML, XML (xml)
The about.html file:
<!DOCTYPE html>
<html lang="en">
<head>
    <meta charset="UTF-8">
    <meta name="viewport" content="width=device-width, initial-scale=1.0">
    <title>About</title>
</head>
<body>
    <h1>About</h1>
</body>
</html>Code language: HTML, XML (xml)
It’s important to note that you should add the blog application to the INSTALLED_APPS list in the settings.py file to make the templates work. Typically, you do it immediately after creating the new Django application.
INSTALLED_APPS = [
    # ...
    'blog.apps.BlogConfig',
]Code language: Python (python)
Fourth, open the views.py file and change the home() and about() view functions to the following:
from django.shortcuts import render


def home(request):
    return render(request, 'blog/home.html')


def about(request):
    return render(request, 'blog/about.html')
Code language: Python (python)
In this views.py file, we import the render() function from the django.shortcuts.
The render() function accepts an HttpRequest object and a path to a template. It renders the template and returns an HttpResponse object.
Fifth, run the Django development server:
python manage.py runserverCode language: CSS (css)Finally, open the URL http://127.0.0.1:8000/ and the URL http://127.0.0.1:8000/about/, you’ll see full HTML pages that come from the home.html and about.html templates.
Passing variables to a template #
We’ll create dummy blog post data and pass it to the home.html template. Later, you’ll learn how to get the post data from the database.
The views.py will look like this:
from django.shortcuts import render

posts = [
    {
        'title': 'Beautiful is better than ugly',
        'author': 'John Doe',
        'content': 'Beautiful is better than ugly',
        'published_at': 'October 1, 2022'
    },
    {
        'title': 'Explicit is better than implicit',
        'author': 'Jane Doe',
        'content': 'Explicit is better than implicit',
        'published_at': 'October 1, 2022'
    }
]


def home(request):
    context = {
        'posts': posts
    }
    return render(request, 'blog/home.html', context)


def about(request):
    return render(request, 'blog/about.html')
Code language: Python (python)
How it works.
- First, create a new list (
posts) that stores the dummy post data. - Second, define a new dictionary
contextinside thehome()function with the keypostsand pass it to therender()function as the third argument.
Inside home.html template, you can access the post data via the posts variable.
The following home.html template that displays the posts:
<!DOCTYPE html>
<html lang="en">
<head>
	<meta charset="UTF-8" />
	<meta name="viewport" content="width=device-width, initial-scale=1.0" />
	<title>Blog</title>
</head>
<body>
	{% for post in posts %}
		<h2>{{ post.title }}</h2>
		<small>Published on {{ post.published_at }} by {{ post.author}}</small>
		<p>{{ post.content }}</p>
	{% endfor %}
</body>
</html>Code language: HTML, XML (xml)
How it works.
- First, use a
forloop to iterate over thepostsvariable. Theforloop ends withendfor. Bothforandendforare surrounded by{%and%}. - Second, place the value of each item in the dictionary using dot notation (
.).
If you save the home.html and open the URL http://127.0.0.1:8000/, you’ll see the post data displayed on the page.
Besides the for loop, you can use another conditional statement like if-else. For example:
<!DOCTYPE html>
<html lang="en">
<head>
	<meta charset="UTF-8" />
	<meta name="viewport" content="width=device-width, initial-scale=1.0" />
	<title>{% if title %} {{title}} {% else %} Blog {% endif %}</title>
</head>
<body>
	{% for post in posts %}
		<h2>{{ post.title }}</h2>
		<small>Published on {{ post.published_at }} by {{ post.author}}</small>
		<p>{{ post.content }}</p>
	{% endfor %}
</body>
</html>
Code language: HTML, XML (xml)
This example uses an if-else statement to show the title variable if it is available or the Blog otherwise.
To pass the title variable to the home.html template, you add a new entry to the context dictionary with the key title in the home() function like this:
def home(request):
    context = {
        'posts': posts,
        'title': 'Zen of Python'
    }
    return render(request, 'blog/home.html', context)
Code language: Python (python)
If you refresh the home URL http://127.0.0.1:8000/, you’ll see the new title.
Typically, a website has some common sections like a header, footer, and sidebar. To avoid repeating them in every template, you can use a base template.
Creating a base template #
First, create a new templates directory in the project directory (not the blog app):
├── blog
├── db.sqlite3
├── django_project
├── manage.py
├── templates
└── users
Code language: plaintext (plaintext)
Next, add the template directory to the TEMPLATES option in the settings.py file of the project:
TEMPLATES = [
    {
        'BACKEND': 'django.template.backends.django.DjangoTemplates',
        'DIRS': [BASE_DIR / 'templates' ],
        'APP_DIRS': True,
        'OPTIONS': {
            'context_processors': [
                'django.template.context_processors.debug',
                'django.template.context_processors.request',
                'django.contrib.auth.context_processors.auth',
                'django.contrib.messages.context_processors.messages',
            ],
        },
    },
]
Code language: Python (python)
Note that BASE_DIR is a Path object that comes from the pathlib built-in module. The forward-slash / is an operator that concatenates the BASE_DIR object with the 'templates' string. This feature is called operator overloading in Python.
Then, create base.html in the templates directory with the following code:
<!DOCTYPE html>
<html lang="en">
    <head>
        <meta charset="UTF-8" />
        <meta name="viewport" content="width=device-width, initial-scale=1.0" />
        <title>{% if title %} {{title}} {% else %} Blog {% endif %}</title>
    </head>
    <body>
        {% block content %}
        {% endblock %}
    </body>
</html>
Code language: HTML, XML (xml)
The base.html is served as the base template for other templates. The name of the base template can be anything like main.html.
After that, change the home.html template inside the templates/blog directory as follows:
{% extends 'base.html' %}

{% block content %}
        <h1>My Posts</h1>
	{% for post in posts%}
	<h2>{{ post.title }}</h2>
	<small>Published on {{ post.published_at }} by {{ post.author}}</small>
	<p>{{ post.content }}</p>
	{% endfor%}
{% endblock %}Code language: HTML, XML (xml)
The home.html extends the base.html template using the extends tag. The home.html template has its section for the content block.
Also, change the about.html template that extends the base.html template:
{% extends 'base.html' %}

{% block content %}
<h1>About</h1>
{% endblock content %}Code language: HTML, XML (xml)
Finally, restart the Django development server and open URL http://127.0.0.1:8000/, and you’ll see the changes.
Configure static files #
The static files are CSS, JavaScript, and image files that you use in the templates. To use the static files in the templates, you follow these steps:
First, create a static directory inside the project directory:
mkdir staticCode language: JavaScript (javascript)The project directory will look like this:
├── blog
├── db.sqlite3
├── manage.py
├── mysite
├── static
└── templatesCode language: CSS (css)
Second, set the STATICFILES_DIRS in the settings.py after the STATIC_URL file so that Django can find the static files in the static directory:
STATIC_URL = 'static/'
STATICFILES_DIRS = [BASE_DIR / 'static']Code language: Python (python)
Third, create three directories js, css, and images directory inside the static directory:
├── static
|  ├── css
|  ├── images
|  └── jsCode language: plaintext (plaintext)
Fourth, create style.css inside the CSS directory with the following contents.
h1{
	color:#0052EA
}

form {
	max-width: 400px;
}
label, input, textarea, select{
	display:block;
	width:100%;
}

input[type="submit"]{
	display:inline-block;
	width:auto;
}

.errorlist {
	padding:0;
	margin:0;
}
.errorlist li{
	color:red;
	list-style:none;
}

.alert{
	padding:0.5rem;
}

.alert-success{
	background-color: #dfd
}
.alert-error{
	background-color:#ba2121;
	color:#fff;
}Code language: CSS (css)
Note that we use only some simple CSS rules to make the tutorials easier to follow. Our primary focus is Django, not CSS or JavaScript.
Fifth, create the app.js inside the js directory with the following code:
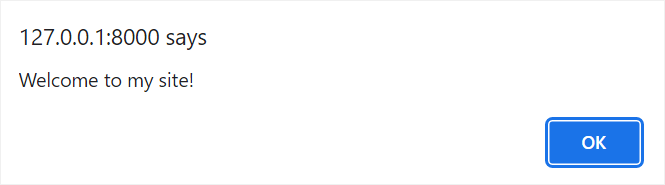
setTimeout(() => {
  alert('Welcome to my site!');
}, 3000);
Code language: JavaScript (javascript)
This code shows an alert after the page is loaded for 3 seconds.
Sixth, edit the base.html template to load the style.css and app.js files:
{%load static %}
<!DOCTYPE html>
<html lang="en">
  <head>
    <meta charset="UTF-8" />
    <meta name="viewport" content="width=device-width, initial-scale=1.0" />
    <link rel="stylesheet" href="{% static 'css/style.css' %}" />
    <script src="{% static 'js/app.js' %}" defer></script>
    <title>My Site</title>
  </head>
  <body>
    {%block content%}
    {%endblock content%}
  </body>
</html>
Code language: HTML, XML (xml)
Seventh, restart the Django development server, open the URL http://127.0.0.1:8000/, and you’ll see that the color of the heading changes according to the CSS rule.
Also, you’ll see an alert after about 3 seconds because the JavaScript code in the app.js runs:
Since we’re not focusing on the JavaScript part, you can remove the code in the app.js file to continue the next tutorial.
Download the Django Project source code
Summary #
- A Django template contains both static and dynamic parts of a web page.
- Django uses Django Template Language (DTL) by default to create templates.
- Use
{{ variable_name }}to display the value of thevariable_namein a template. - Use
{% control_tag %}to include a control tag in a template. - Use the
statictag to load the static files including CSS, JavaScript, and images.