Summary: in this tutorial, you’ll learn how to create a Django Form to create, update, and delete Post models of the blog application.
This tutorial begins where creating the Django admin page tutorial left off.
Django admin is good enough for admin to manage the contents based on the models. However, when you want the users of the website to manage their content, you need to create separate forms for them.
Introduction to the Django Form #
Handling forms involves very complex logic:
- Prepare an HTML form.
- Validate fields in the browser using JavaScript or built-in HTML5 validation.
- Receive the values in the server.
- Validate fields in the server.
- Processing form values like saving them into the database if the form is valid
- Rerender the form with old values and an error message if the form is invalid.
Django forms simplify and automate almost all of the above steps.
Note that you can write code to do all of the above steps manually if you want more customization of the forms.
All forms in Django inherit from the django.forms.Form class. The ModelForm class allows you to create a form that associates with a model .
Defining a form #
First, create a new file forms.py in the blog application’s directory.
Second, define a new form called PostForm that inherits from the ModelForm class:
from django.forms import ModelForm
from .models import Post

class PostForm(ModelForm):
    class Meta:
        model = Post
        fields = ['title','content', 'author', 'author']       Code language: Python (python)
How it works.
- Import
ModelFormfrom thedjango.forms. - Import
Postfrom themodels.pymodule. - Define
PostFormclass that inherits from theModelFormclass. In thePostFormclass, define theMetaclass and specify themodelandfieldsattributes.
Third, define a route that displays the PostForm:
from django.urls import path
from . import views

urlpatterns = [
    path('', views.home, name='posts'),
    path('post/create', views.create_post, name='post-create'),
    path('about/', views.about, name='about'),
]
Code language: Python (python)
Fourth, define create_post() function that displays the form:
from django.shortcuts import render
from .models import Post
from .forms import PostForm


def create_post(request):
    if request.method == 'GET':
        context = {'form': PostForm()}
        return render(request, 'blog/post_form.html', context)


def home(request):
    posts = Post.objects.all()
    context = {'posts': posts}
    return render(request, 'blog/home.html', context)


def about(request):
    return render(request, 'blog/about.html')Code language: Python (python)
In the create_post(), if the HTTP request is GET, then create a new instance of the PostForm class and pass it to the render() function.
Fifth, create the post_form.html template:
{% extends 'base.html' %}
{% block content %}
<h2>New Post</h2>
<form method="post" novalidate>
{% csrf_token %}
{{ form.as_p }}
<input type="submit" value="Save" />
</form>
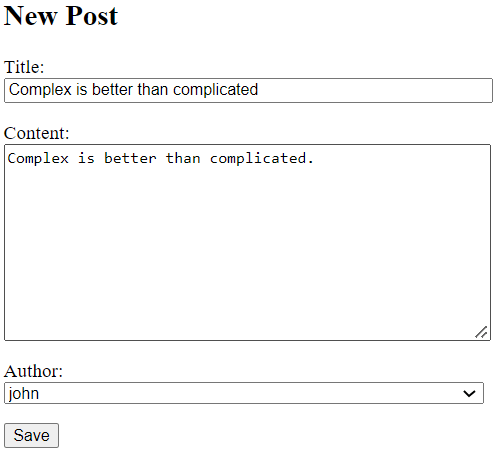
{% endblock content %}Code language: HTML, XML (xml)In the post_form.html, add the csrf_token tag and render the form using the form.as_p property. It’ll output the following:
<p>
<label for="id_title">Title:</label>
<input type="text" name="title" maxlength="120" required id="id_title">
</p>
<p>
<label for="id_content">Content:</label>
<textarea name="content" cols="40" rows="10" required id="id_content"></textarea>
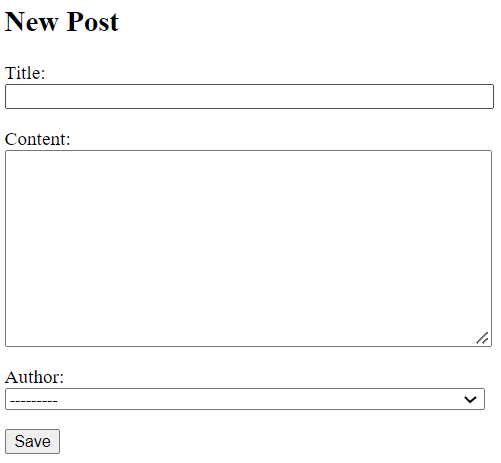
</p>Code language: HTML, XML (xml)If you open the URL http://127.0.0.1:8000/post/create, you’ll see the following form:
If you click the Save button, you’ll see the error message:
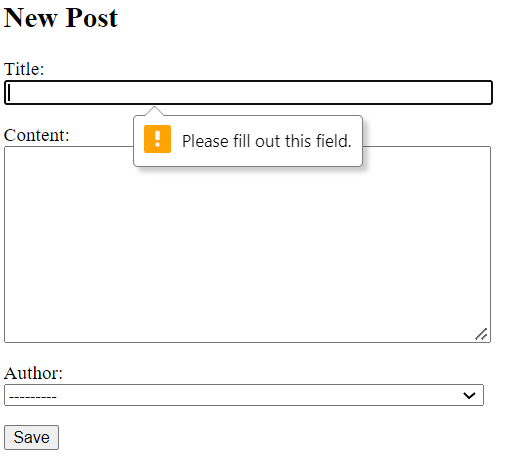
Because the title, content, and author fields of the Post model are required fields by default, the PostForm that uses the Post model also renders an HTML form that requires these fields.
To test the server validation, you can disable the client validation by adding the novalidate property to the form like this:
{% extends 'base.html' %}

{% block content %}

<h2>New Post</h2>
<form method="post" novalidate>
	{% csrf_token %}
	{{ form.as_p }}
	<input type="submit" value="Save" />
</form>

{% endblock content %}Code language: HTML, XML (xml)
To handle the HTTP POST method, you need to modify the create_post function in the views.py of the blog application:
from django.shortcuts import render, redirect
from .models import Post
from .forms import PostForm


def create_post(request):
    if request.method == 'GET':
        context = {'form': PostForm()}
        return render(request, 'blog/post_form.html', context)
    elif request.method == 'POST':
        form = PostForm(request.POST)
        if form.is_valid():
            form.save()
            return redirect('posts')
        else:
            return render(request, 'blog/post_form.html', {'form': form})

# ...Code language: Python (python)
If the HTTP request is POST (request.method=='POST'):
- Create a new instance of the
PostFormclass with the data from the POST. - Check if the form is valid.
- If the form is valid, save the form values into the database and redirect the web browser to the
'posts'path. - Otherwise, rerender the form with old values and errors.
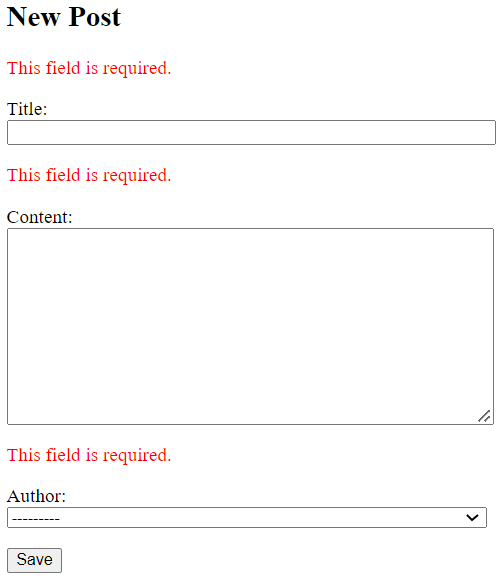
If you submit the form without entering anything values, you’ll get the following error messages:
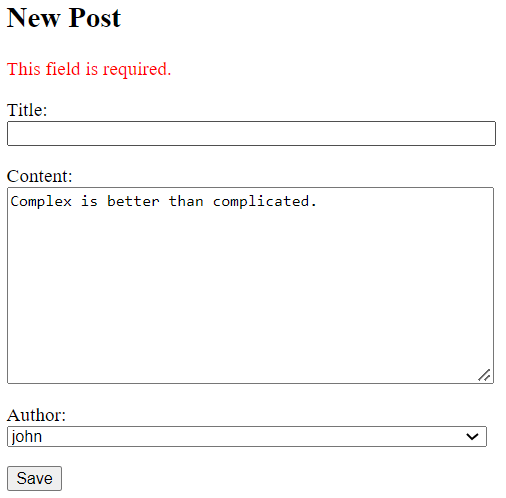
However, when you provide values for some required fields, Django renders the form with old values and displays error messages for only invalid fields.
For example, the following form displays the error message for the title field while retaining the old values for the content and author fields:
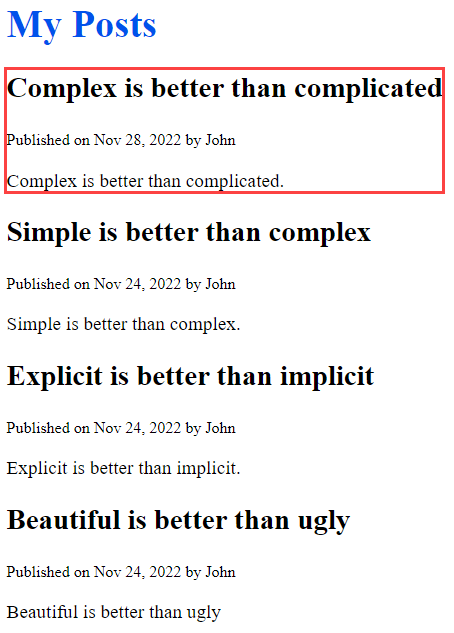
If you enter valid values for all the fields, Django saves the values into the database
…and redirect to the post list:
Download the Django Project source code
Summary #
- Create a model form by subclassing the
ModelForm. - Add the
novalidateproperty to the form to disable HTML5 validation temporarily for testing server validation. - Use
form.is_valid()to check if the form is valid. - Use
form.save()to save form values into the database. - Use
redirect()to redirect to a path.