Summary: in this tutorial, you’ll learn how to use the PyQt QThread to create a responsive Qt application.
Introduction to the PyQt QThread class #
If a program has long-running operations, it may lag for a short moment. In some cases, the program is frozen completely.
Therefore, when developing PyQt programs, you should know how to handle these situations. And to do that, you can take the advantage of threading.
If you’re not familiar with the threading concept, you can learn more about it in the Python concurrency series.
Python has a number of modules for handling threads such as threading and concurrent.futures.
While you can use these modules, PyQt provides a better way of doing it by using the QThread class and other classes.
The main thread and worker threads #
Qt applications are event-based. When you call the exec() method, it starts an event loop and creates a thread that is referred to as the main thread.

Any events that occur in the main thread run synchronously within the main event loop.
To take the advantage of threading, you need to create a secondary thread to offload the long-running operations from the main thread. The secondary threads are often referred to as worker threads.
To communicate between the main thread and the worker threads, you use signals and slots. The steps for using the QThread class are as follows:
First, create a class that inherits from the QObject and offloads the long-running operations to this class.
class Worker(QObject):
   passCode language: Python (python)
The reason we subclass the QObject class is that we want to use the signal and slot.
Next, create a worker thread and worker object from the main thread
self.worker = Worker()
self.worker_thread = QThread()Code language: Python (python)
The self is an instance of the QMainWindow or QWidget.
Then, connect signals and slots of the Worker class with the main thread.
After that, move the worker to the worker thread by calling the moveToThread() method of the worker object:
self.worker.moveToThread(self.worker_thread)Code language: Python (python)Finally, start the worker thread:
self.worker_thread.start()Code language: Python (python)It’s important to note that you should only communicate with the worker via signals and slots. And you do not call any of its methods from the main thread. For example:
self.worker.do_some_work() # DON'TCode language: Python (python)Note that another way of using the QThread class is to subclass it and override the run() method. However, it is not recommended way. Please find the detailed answer here.
PyQt QThread example #
We’ll create a simple program that uses the QThread:
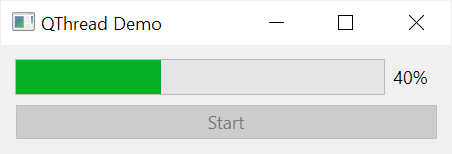
The program consists of a progress bar and a button. When you click the start button, the long-running operation will run in a worker thread and update the progress back to the main thread via signals and slots.
Here’s the complete program:
import sys
from PyQt6.QtWidgets import QApplication, QMainWindow, QWidget, QLabel, QPushButton, QVBoxLayout, QProgressBar
from PyQt6.QtCore import QThread, QObject, pyqtSignal as Signal, pyqtSlot as Slot
import time


class Worker(QObject):
    progress = Signal(int)
    completed = Signal(int)

    @Slot(int)
    def do_work(self, n):
        for i in range(1, n+1):
            time.sleep(1)
            self.progress.emit(i)

        self.completed.emit(i)


class MainWindow(QMainWindow):
    work_requested = Signal(int)

    def __init__(self, *args, **kwargs):
        super().__init__(*args, **kwargs)

        self.setGeometry(100, 100, 300, 50)
        self.setWindowTitle('QThread Demo')

        # setup widget
        self.widget = QWidget()
        layout = QVBoxLayout()
        self.widget.setLayout(layout)
        self.setCentralWidget(self.widget)

        self.progress_bar = QProgressBar(self)
        self.progress_bar.setValue(0)

        self.btn_start = QPushButton('Start', clicked=self.start)

        layout.addWidget(self.progress_bar)
        layout.addWidget(self.btn_start)

        self.worker = Worker()
        self.worker_thread = QThread()

        self.worker.progress.connect(self.update_progress)
        self.worker.completed.connect(self.complete)

        self.work_requested.connect(self.worker.do_work)

        # move worker to the worker thread
        self.worker.moveToThread(self.worker_thread)

        # start the thread
        self.worker_thread.start()

        # show the window
        self.show()

    def start(self):
        self.btn_start.setEnabled(False)
        n = 5
        self.progress_bar.setMaximum(n)
        self.work_requested.emit(n)

    def update_progress(self, v):
        self.progress_bar.setValue(v)

    def complete(self, v):
        self.progress_bar.setValue(v)
        self.btn_start.setEnabled(True)


if __name__ == '__main__':
    app = QApplication(sys.argv)
    window = MainWindow()
    sys.exit(app.exec())Code language: Python (python)
How it works.
Defining the worker class #
The Worker class inherits from QObject class so that it can support signals and slots. In practice, you move the long operations to the Worker class:
class Worker(QObject):Code language: Python (python)The Worker class has two signals:
- progress
- completed
These signals are instances of the pyqtSignal class. Because we import the pyqtSignalSignal, we can use the Signal instead:
progress = Signal(int)
completed = Signal(int)Code language: Python (python)
Both progress and completed signal accept an integer.
The Worker class will emit the progress signal when a part of the work is done and the completed signal when the work is completed.
The Work class has the do_work() method:
@Slot(int)
def do_work(self, n):
    for i in range(1, n+1):
        time.sleep(1)
        self.progress.emit(i)

    self.completed.emit(i)Code language: Python (python)
The do_work()Slot() decorator (or pyqtSlot). The @Slot() decorator turns the do_work() method into a slot.
The @Slot() decorator is optional. However, connecting a signal to a decorated Python method can help reduce memory usage and make it slightly faster.
The do_work() method accepts an integer. It iterates over a range starting from 1 to the argument. In each iteration, it pauses for one second using the time.sleep() and emits the progress signal with the current value using the emit() method.
Once finished, the do_work() method emits the completed signal with the value last integer value.
Communicating between the main thread and the worker thread #
First, create a signal in the MainWindow class:
work_requested = Signal(int)Code language: Python (python)Second, create a Worker object and worker thread:
self.worker = Worker()
self.worker_thread = QThread()Code language: Python (python)
Third, connect the progress and completed signal of the worker object with the methods of the main window:
self.worker.progress.connect(self.update_progress)
self.worker.completed.connect(self.complete)Code language: Python (python)
Fourth, connect the work_requested signal of the MainWindow with the do_work method of the worker object:
self.work_requested.connect(self.worker.do_work)Code language: Python (python)Fifth, move the worker to the worker thread by calling the moveToThread() method:
self.worker.moveToThread(self.worker_thread)Code language: Python (python)Finally, start the worker thread:
self.worker_thread.start()Code language: Python (python)Summary #
- Use
QThreadclass to create a worker thread to offload a long operation from the main thread. - Use signals and slots to communicate between the main thread and the worker thread.