Summary: in this tutorial, you’ll learn how to use the Python QListWidget class to create a list view.
Introduction to the PyQt QListWidget #
The QListWidget class allows you to create a list view widget that has a single column of items. The QListWidgetItem class represents the items on the list.
The QListWidget class has various useful methods for manipulating items including:
addItems(iterable)– adds items to the list from an iterable of strings.addItem(QListWidgetItem)– adds an item to the end of the list.insertItem(row, QListWidgetItem)– inserts an item at the specified row.takeItem(row)– removes an item from a specified row.clear()– removes and deletes all items from the list.
PyQt QListWidget class example #
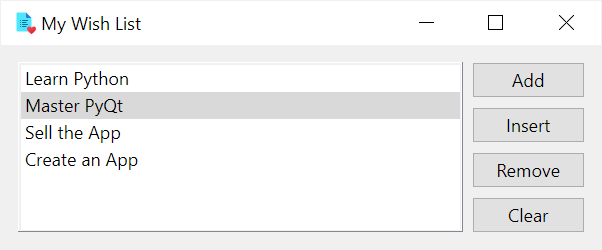
The following example shows how to add, insert, remove, and clear all items from a QListWidget:
import sys
from PyQt6.QtWidgets import QInputDialog, QApplication, QWidget, QGridLayout, QListWidget, QPushButton
from PyQt6.QtGui import QIcon
class MainWindow(QWidget):
def __init__(self, *args, **kwargs):
super().__init__(*args, **kwargs)
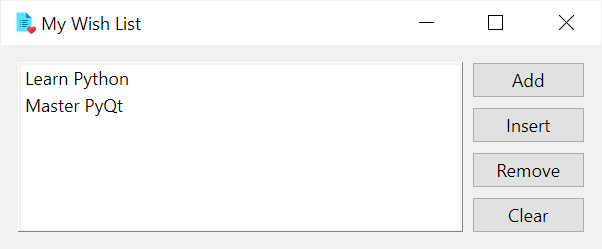
self.setWindowTitle('My Wish List')
self.setWindowIcon(QIcon('./assets/wishlist.png'))
self.setGeometry(100, 100, 400, 100)
layout = QGridLayout(self)
self.setLayout(layout)
self.list_widget = QListWidget(self)
self.list_widget.addItems(['Learn Python', 'Master PyQt'])
layout.addWidget(self.list_widget, 0, 0, 4, 1)
# create buttons
add_button = QPushButton('Add')
add_button.clicked.connect(self.add)
insert_button = QPushButton('Insert')
insert_button.clicked.connect(self.insert)
remove_button = QPushButton('Remove')
remove_button.clicked.connect(self.remove)
clear_button = QPushButton('Clear')
clear_button.clicked.connect(self.clear)
layout.addWidget(add_button, 0, 1)
layout.addWidget(insert_button, 1, 1)
layout.addWidget(remove_button, 2, 1)
layout.addWidget(clear_button, 3, 1)
# show the window
self.show()
def add(self):
text, ok = QInputDialog.getText(self, 'Add a New Wish', 'New Wish:')
if ok and text:
self.list_widget.addItem(text)
def insert(self):
text, ok = QInputDialog.getText(self, 'Insert a New Wish', 'New Wish:')
if ok and text:
current_row = self.list_widget.currentRow()
self.list_widget.insertItem(current_row+1, text)
def remove(self):
current_row = self.list_widget.currentRow()
if current_row >= 0:
current_item = self.list_widget.takeItem(current_row)
del current_item
def clear(self):
self.list_widget.clear()
if __name__ == '__main__':
app = QApplication(sys.argv)
window = MainWindow()
sys.exit(app.exec())Code language: Python (python)How it works.
First, create a QListWidget object:
self.list_widget = QListWidget(self)Code language: Python (python)Second, add a list of items to the list:
self.list_widget.addItems(['Learn Python', 'Master PyQt'])Code language: Python (python)Third, create four buttons add, insert, remove, and clear and connect their clicked signals to the corresponding method.
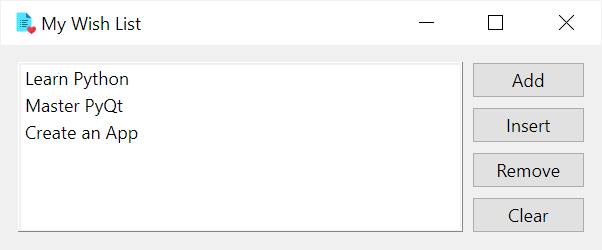
Fourth, define the add() method that gets a text from the user and adds it to the list using the addItem() method:
def add(self):
    text, ok = QInputDialog.getText(self, 'Add a New Wish', 'New Wish:')
    if ok and text:
        self.list_widget.addItem(text)Code language: Python (python)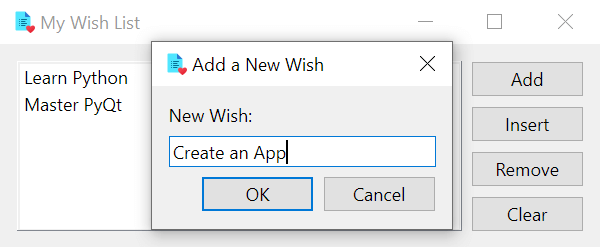
The QInputDialog.getText()OK button.
If the user enters a text and clicks the OK button, we add it to the list using the addItem() method of the QListWidget object.
Note that you can create a QListWidgetItem object and add it to the list instead of using a string. For example:
def add(self):
    text, ok = QInputDialog.getText(self, 'Add a New Wish', 'New Wish:')
    if ok and text:
        list_item = QListWidgetItem()
        list_item.setText(text)
        self.list_widget.addItem(list_item)Code language: Python (python)
The QListWidgetItem provides more functionality like setting an icon to the list item.
Fifth, insert a new item to the list after the currently selected item:
def insert(self):
    text, ok = QInputDialog.getText(self, 'Insert a New Wish', 'New Wish:')
    if ok and text:
        current_row = self.list_widget.currentRow()
        self.list_widget.insertItem(current_row+1, text)Code language: Python (python)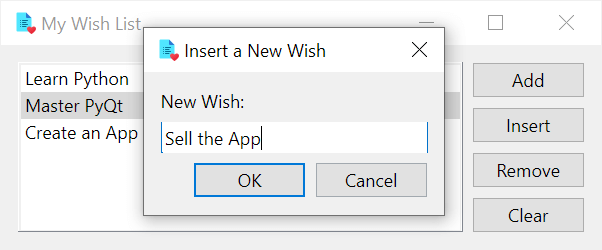
In this insert() method , we use the currentRow() method of the QListWidget object to get the current row of the currently selected item and insertItem() method to insert an item at the next row.
Sixth, define the remove() method that removes the currently selected item from the list:
def remove(self):
    current_row = self.list_widget.currentRow()
    if current_row >= 0:
        current_item = self.list_widget.takeItem(current_row)
        del current_itemCode language: Python (python)
In this remove() method, we get the row of the currently selected item and use the takeItem() method of the QListWidget object to remove the item.
Seventh, define the clear() function to remove all items from the list:
def clear(self):
    self.list_widget.clear()Code language: Python (python)
In this clear()clear()QListWidget object to remove all items from the list.
Summary #
- Use the
QListWidgetclass allows you to create a list view widget.